


This is a sponsored post. I have been compensated for this post. However, all opinions are of my own and truthful. This post contains paid links.

 It's a great day when something like this arrives at your front door.
I was offered Martha Stewart Craft's jewelry line to create my own jewelry by hand. I have never made jewelry before, but being Martha Stewart brand I knew it was going to be user friendly and easy to work with.
To recreate my personalize necklace you will need:
optional: Work mat , lip balm (for inside the locket)

I started by laying out all of my items on and around the Martha Stewart work mat. The work mat isn't necessary, but makes it easy to keep everything in its place and it serves as a place to keep mess isolated. I loved that the rhinestones would stay put on the work mat and that I could squirt the glazes right on the surface, then wipe it away when I was done.
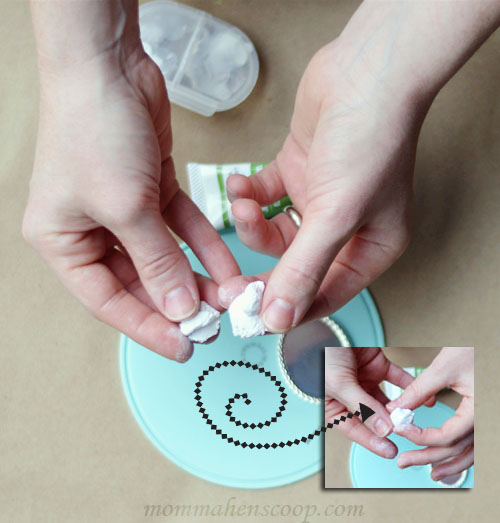
The epoxy comes in two parts. Take equal amounts of each side, mix together well by kneading. If you are using colored epoxy, continue to knead until the color is uniform.

Press firmly into mold and allow to dry for 24 hours.
After 24 hours, remove from mold, paint with jewelry glaze. For an aged look simply wipe a dry rag across the setting to remove excess paint. Allow to dry.

Using a toothpick apply jewelry glue to the back of the setting and apply to the locket. You'll notice I added a second setting to dangle to the side. this is the best part about Martha Stewart do-it-yourself jewelry. You can make it your own. Be sure to embellish as you see fit.

Inside of my locket contains my favorite lip balm. Simply melt down a small amount of lipbalm in the microwave, pour into the locket, and allow to re-firm.
 |
| Pin it! |

I decided I wanted my necklace to be a little more personal.
Mix together a little more epoxy.
Press into the large setting, removing any excess.

To create a nice smooth surface, dab a little water onto your finger and rub until the surface is nice and smooth.
At this point I asked my husband to wet his thumb and press it into the epoxy. I lightly pressed three small rhinestones along the side to represent each of my children.

Allow the setting to dry for 24 hours. After dry paint with light gold jewelry glaze for a light sheen.
Using a jump ring I added a "T" to represent our last name.
Admittedly, I'm not a huge jewelry fan. However, given the opportunity to personalize and create my own settings allowed me to create a piece of jewelry that will always stay close to my heart and remind me of those that I love and that are dearest to me.
There are almost unlimited options. Be sure to visit Michaels, browse, and be inspired to create your own line of jewelry!
- Facebook: https://www.facebook.com/InspiredByPlaid
- Twitter: https://twitter.com/PlaidCrafts
- Pinterest: http://pinterest.com/plaidcrafts